XCUITest Interview Questions/Answers
XCUITest is a testing framework for iOS apps that allows developers to write UI tests for their iOS applications. It is part of Apple’s Xcode developer tools suite and is built on top of Apple’s XCTest framework. XCUITest provides a range of tools and APIs that developers can use to automate UI testing, including interacting with app elements, simulating user interactions, capturing screenshots, and handling asynchronous tasks. It is designed to be fast, reliable, and easy to use, and it supports testing on both real devices and simulators. With XCUITest, developers can ensure that their iOS apps function correctly and perform as expected across a range of scenarios and environments.
What is XCUITest, and how does it differ from other iOS testing frameworks?
XCUITest is a testing framework for iOS applications that allows developers to write and execute automated tests for their iOS applications. It is part of Apple’s XCTest framework and is designed specifically for testing iOS applications, allowing developers to test the user interface, functionality, and performance of their iOS applications.
XCUITest differs from other iOS testing frameworks in several ways. Firstly, it is the official testing framework provided by Apple, which means it is regularly updated and maintained. This provides developers with a high level of reliability and stability when writing and executing their tests.
Secondly, XCUITest provides a range of powerful testing features, such as the ability to interact with and manipulate elements within an application’s user interface, which makes it easy to write complex tests. XCUITest also provides a range of tools for debugging and analyzing tests, making it easier for developers to diagnose and fix issues with their applications.
Finally, XCUITest integrates seamlessly with other iOS development tools, such as Xcode and Apple’s Continuous Integration (CI) servers. This makes it easy to incorporate automated testing into the development process and ensures that tests can be executed quickly and efficiently.
Overall, XCUITest is a powerful and flexible testing framework that provides developers with the tools they need to write and execute reliable and efficient automated tests for their iOS applications.
What are the advantages of using XCUITest compared to Appium for iOS app testing?
Both XCUITest and Appium are popular testing frameworks for iOS app testing, but there are some differences between the two. Here are some advantages of using XCUITest over Appium:
- Integration with Xcode: XCUITest is integrated with Xcode, Apple’s official integrated development environment (IDE) for iOS development. This means that it is easy to create and run tests using XCUITest, and it can be seamlessly integrated into the iOS development workflow. In contrast, Appium requires additional setup and configuration to integrate with Xcode.
- Native support for iOS UI elements: XCUITest provides native support for iOS user interface (UI) elements, which means that it can interact with UI elements in a more reliable and efficient way. This can result in more stable and accurate tests, as compared to Appium, which uses a web-based approach for UI interaction.
- Faster test execution: XCUITest is faster than Appium for iOS app testing, due to its native support for iOS UI elements and integration with Xcode. This results in faster test execution times and can be particularly useful for large and complex iOS applications.
- Better reliability and stability: Since XCUITest is an official Apple testing framework, it is well-maintained and regularly updated. This makes it more reliable and stable than Appium, which is an open-source framework and may be subject to issues related to compatibility with the latest versions of iOS and Xcode.
- Native support for XCTest assertions: XCUITest provides native support for XCTest assertions, which are built into Xcode and are a part of Apple’s official XCTest framework. This makes it easier to write and execute tests that use these assertions, without the need for additional setup or configuration.
Overall, XCUITest has several advantages over Appium for iOS app testing, including its integration with Xcode, native support for iOS UI elements, faster test execution, better reliability and stability, and native support for XCTest assertions.
How do you create a UI test target in Xcode, and what steps do you follow to write a UI test?
To create a UI test target in Xcode, you can follow these steps:
- Open your Xcode project.
- Select File > New > Target from the menu bar.
- Select iOS > Test from the left-hand panel.
- Choose “UI Testing Bundle” and click Next.
- Give your new test target a name and select the app that you want to test.
- Click Finish to create the new test target.
Once you have created the UI test target, you can follow these steps to write a UI test:
- Open the UI test file that was created when you created the UI test target. This file is typically named “YourAppUITests.swift”.
- Create a new test method by adding a new function to the class.
- Use the XCUIApplication class to launch your application and interact with the UI elements. For example, you can use the XCUIApplication().buttons[“buttonName”].tap() method to tap a button with a specific name.
- Use XCTAssert methods to test the expected behavior of the application. For example, you can use XCTAssert(XCUIApplication().navigationBars[“Title”].exists) to check if a navigation bar with the title “Title” exists on the screen.
- Run the test by clicking on the diamond-shaped Run button in the gutter next to the test method.
- Observe the test results in the Test navigator. The Test navigator displays the results of all your tests, including the UI tests.
- If the test fails, use the error message and other diagnostic information provided by Xcode to identify and fix the issue.
- Repeat steps 2–7 to create and run additional UI tests.
Overall, the process of creating a UI test target in Xcode and writing UI tests involves creating a new target, writing test methods that interact with the UI elements, running the tests, and analyzing the results to identify and fix any issues.
Is it possible to test the iOS app using XCUITest without source code?
Yes, it is possible to test an iOS app using XCUITest without the source code.
What is the difference between UI testing and unit testing?
UI testing and unit testing are two different types of tests that can be performed using the XCTest framework in Xcode. Here are the main differences between UI testing and unit testing:
- Scope: Unit testing focuses on testing individual units of code, such as functions or methods, in isolation from the rest of the code. UI testing, on the other hand, focuses on testing the behavior of the app’s user interface (UI) as a whole, by interacting with the app’s UI elements and verifying their behavior.
- Granularity: Unit testing is typically more granular than UI testing, since it focuses on testing individual units of code. UI testing, on the other hand, is typically more high-level, since it focuses on testing the app’s behavior as a whole.
- Speed: Unit tests are typically faster to run than UI tests, since they involve testing small, isolated units of code. UI tests, on the other hand, can be slower to run, since they involve launching the app and interacting with its UI elements.
- Environment: Unit tests can be run in a variety of environments, including on the developer’s machine, on a continuous integration (CI) server, or in a cloud-based testing service. UI tests, on the other hand, are typically run on physical or virtual devices that simulate the app’s real-world environment.
- Dependencies: Unit tests can be written and run without any dependencies on the app’s user interface or external resources. UI tests, on the other hand, may require access to external resources such as APIs or databases in order to test the app’s behavior.
Overall, UI testing and unit testing serve different purposes and are used to test different aspects of an iOS app. While unit testing focuses on testing individual units of code in isolation, UI testing focuses on testing the behavior of the app’s user interface as a whole.
What is an XCUIApplication, and how is it used in XCUITest?
XCUIApplication is a class in the XCUITest framework that is used to represent an instance of your iOS app when it is launched for testing. It is used in XCUITest to interact with your app’s user interface (UI) elements, simulate user actions, and verify the behavior of your app.
When you create an instance of XCUIApplication in your XCUITest code, you are essentially launching a new instance of your app that is separate from the one that you may be running on your device or simulator. This allows you to interact with your app in a controlled testing environment and test its behavior under a variety of conditions.
You can use the XCUIApplication class to access and interact with various elements of your app’s UI, such as buttons, labels, text fields, and more. For example, you can use the .buttons property of XCUIApplication to access all of the buttons in your app's UI, and then use the .tap() method to simulate tapping a specific button.
In addition to interacting with your app’s UI, you can also use XCUIApplication to launch your app with specific launch arguments or environment variables, which can be useful for testing different scenarios or configurations.
Overall, XCUIApplication is a key component of XCUITest, as it provides a way to interact with your app’s UI and verify its behavior in a controlled testing environment.
How to use Soft Assert and Hard Assert using XCUITest?
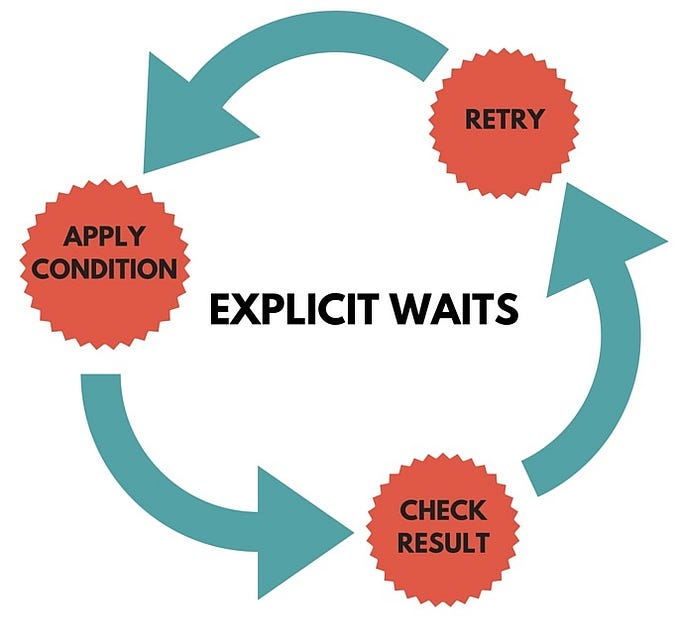
How to apply wait for condition using XCUITest?
How do you access app elements and UI elements in XCUITest?
How do you use predicates to find UI elements in XCUITest?
In XCUITest, predicates can be used to find UI elements that match specific criteria. A predicate is essentially a query that you can use to filter a collection of UI elements based on their attributes or properties.
Here are the steps to use predicates to find UI elements in XCUITest:
- Create a predicate: You can create a predicate using the
NSPredicateclass, which is part of the Foundation framework. The predicate should specify the criteria that you want to use to filter the collection of UI elements. For example, you could create a predicate to find all buttons with the label "Submit":
let predicate = NSPredicate(format: “label == ‘Submit’”)2. Access the collection of UI elements: You can access the collection of UI elements that you want to filter using the XCUIApplication class. For example, you could access all buttons in your app's UI using the .buttons property:
let app = XCUIApplication()
let buttons = app.buttons
3. Apply the predicate: You can apply the predicate to the collection of UI elements using the filtered method of the XCUIElementQuery class. For example, you could apply the predicate to the buttons collection to find all buttons with the label "Submit":
let submitButtons = buttons.matching(predicate)4. Interact with the UI element(s): Once you have filtered the collection of UI elements using the predicate, you can interact with the resulting element(s) as needed. For example, you could tap the first button in the submitButtons collection using the .firstMatch property and the .tap() method:
submitButtons.firstMatch.tap()Overall, using predicates to find UI elements in XCUITest can be a powerful way to filter a large collection of elements and interact with only those that match specific criteria.
What is XCUIElementQuery, and how is it used in XCUITest?
XCUIElementQuery is a class in XCUITest that represents a collection of UI elements that match a specific set of criteria. It is used to locate UI elements in an app’s user interface and interact with them during testing.
XCUIElementQuery provides a number of methods that you can use to filter and access specific UI elements. Some common methods include:
.element: Returns the first UI element in the query's collection that matches the specified criteria..firstMatch: Returns the first UI element in the query's collection that matches the specified criteria..matching: Returns a new query that includes only the UI elements in the original query's collection that match the specified criteria..children(matching:): Returns a new query that includes only the child UI elements of the elements in the original query's collection that match the specified criteria..descendants(matching:): Returns a new query that includes all descendant UI elements of the elements in the original query's collection that match the specified criteria.
You can create an instance of XCUIElementQuery using the XCUIApplication class, which represents the app that you are testing. For example, you can access all buttons in your app's UI using the following code:
let app = XCUIApplication()
let buttons = app.buttons
Once you have an instance of XCUIElementQuery, you can use its methods to access and interact with specific UI elements. For example, you can tap the first button in the buttons collection using the following code:
buttons.firstMatch.tap()Overall, XCUIElementQuery is a powerful tool in XCUITest that allows you to locate and interact with specific UI elements in an app’s user interface during testing.
What is XCUIElementAttributes, and how is it used in XCUITest?
XCUIElementAttributes is a set of attributes and properties of UI elements in XCUITest. These attributes and properties can be used to locate, identify, and interact with UI elements in an app’s user interface during testing.
Some common XCUIElementAttributes include:
identifier: A unique identifier for the UI element.elementType: The type of UI element, such as button, label, or text field.isEnabled: A Boolean value indicating whether the UI element is enabled or disabled.isVisible: A Boolean value indicating whether the UI element is visible on the screen.frame: The frame of the UI element in the app's coordinate system.label: The text label associated with the UI element.placeholderValue: The placeholder text for a text field or other input element.title: The title text for a button or other UI element.
You can access the XCUIElementAttributes for a specific UI element using the attributes property of the XCUIElement class. For example, you can access the label attribute for a button using the following code:
let app = XCUIApplication()
let submitButton = app.buttons["Submit"]
let submitButtonLabel = submitButton.attributes["label"]
Once you have accessed the XCUIElementAttributes for a UI element, you can use them to locate and interact with the element in your test code. For example, you could tap a button with the label “Submit” using the following code:
let app = XCUIApplication()
let submitButton = app.buttons["Submit"]
submitButton.tap()
Overall, XCUIElementAttributes are a key part of XCUITest, allowing you to locate and interact with specific UI elements in an app’s user interface during testing.
How do you use XCUITest to test gestures in iOS apps?
XCUITest provides built-in support for testing gestures in iOS apps. You can use XCUITest to simulate gestures such as taps, swipes, pinches, and rotations, and to verify that the app responds correctly to each gesture.
To test gestures in XCUITest, you can use the XCUICoordinate class to simulate touch events on specific points in the app's user interface. The XCUICoordinate class represents a point in the app's coordinate system, and provides methods for simulating different types of gestures.
Here is an example of how to use XCUITest to test a swipe gesture:
let app = XCUIApplication()
let myView = app.otherElements["myView"]

// Get the starting point and ending point of the swipe gesture
let startCoordinate = myView.coordinate(withNormalizedOffset: CGVector(dx: 0.5, dy: 0.9))
let endCoordinate = myView.coordinate(withNormalizedOffset: CGVector(dx: 0.5, dy: 0.1))

// Perform the swipe gesture
startCoordinate.press(forDuration: 0.1, thenDragTo: endCoordinate)
In this example, we first obtain a reference to a view in the app’s user interface using its accessibility identifier. We then create two XCUICoordinate objects to represent the starting point and ending point of the swipe gesture. Finally, we use the press(forDuration:thenDragTo:) method of the starting coordinate to simulate the swipe gesture.
XCUITest also provides other methods for simulating gestures, such as tap(), pinch(withScale:velocity:), and rotate(rotation:velocity:). These methods can be used in a similar way to test other types of gestures in iOS apps.
Overall, XCUITest makes it easy to test gestures in iOS apps, allowing you to ensure that your app responds correctly to user input and provides a seamless user experience.
How do you use XCUIScreenshot to capture screenshots during UI tests?
XCUIScreenshot is a class provided by XCUITest that allows you to capture screenshots of the app’s user interface during UI tests. You can use XCUIScreenshot to capture screenshots at specific points in your test code, and then use these screenshots to verify that the app’s user interface appears correctly.
Here is an example of how to use XCUIScreenshot to capture a screenshot in XCUITest:
let app = XCUIApplication()
let screenshot = app.screenshot()
let attachment = XCTAttachment(screenshot: screenshot)
attachment.name = "MyScreenshot"
attachment.lifetime = .keepAlways
add(attachment)
In this example, we first obtain a reference to the current XCUIApplication object. We then call the screenshot() method of this object to capture a screenshot of the app's user interface. We create an XCTAttachment object from the screenshot, which allows us to attach the screenshot to the Xcode test report. We set the name property of the attachment to "MyScreenshot" to give the screenshot a descriptive name, and we set the lifetime property to .keepAlways to ensure that the screenshot is retained even if the test succeeds.
You can use XCUIScreenshot to capture screenshots at different points in your test code, such as before and after performing a specific action, to ensure that the app’s user interface appears correctly. You can also use XCUIScreenshot to capture screenshots in different device configurations, such as different screen sizes or orientations, to verify that the app behaves correctly in all cases.
Overall, XCUIScreenshot is a powerful tool for capturing screenshots during UI tests, allowing you to quickly and easily verify that the app’s user interface appears correctly and provides a seamless user experience.
How do you handle testing UI elements that are hidden or not visible in the current view?
When testing UI elements in XCUITest, you may encounter situations where the element you need to interact with is not currently visible on the screen. There are several ways to handle this situation:
- Scroll to the element: If the element is located within a scrollable view, you can use the
scrollToElement()method to scroll to the element. This method will automatically scroll the view until the element is visible on the screen. - Access the element using its parent view: If the element is located within a parent view that is visible on the screen, you can access the element using the
descendants(matching:)method of the parent view'sXCUIElementQuery. This method returns all the descendants of the parent view that match a given set of criteria, such as a specific accessibility identifier or class. - Use the
existsproperty: If you are unsure whether an element is currently visible on the screen, you can use theexistsproperty of theXCUIElementto check whether the element exists in the app's user interface. If the element does not exist, you can perform some action to bring it into view, such as scrolling or tapping on a button. - Use the
waitForExistence(timeout:)method: If you need to wait for an element to become visible on the screen, you can use thewaitForExistence(timeout:)method of theXCUIElement. This method waits for the element to exist in the app's user interface for a specified amount of time before timing out.
Overall, handling UI elements that are hidden or not visible in the current view requires careful consideration of the app’s user interface and the actions required to bring the element into view. XCUITest provides several methods for accessing and interacting with UI elements, allowing you to test your app’s user interface and ensure a seamless user experience for your users.
How do you test different screen orientations using XCUITest?
To test different screen orientations using XCUITest, you can use the XCUIDevice class to set the orientation of the device. Here's an example of how to use XCUITest to test both portrait and landscape orientations:
let app = XCUIApplication()
let device = XCUIDevice.shared

// Set the device orientation to portrait
device.orientation = .portrait
XCTAssertTrue(device.orientation.isPortrait)

// Perform some tests in portrait mode
// ...

// Set the device orientation to landscape
device.orientation = .landscapeLeft
XCTAssertTrue(device.orientation.isLandscape)

// Perform some tests in landscape mode
// ...

// Set the device orientation back to portrait
device.orientation = .portrait
XCTAssertTrue(device.orientation.isPortrait)
In this example, we first obtain a reference to the current XCUIApplication object and the shared XCUIDevice object. We then set the device orientation to portrait using the orientation property and the .portrait enumeration value. We can then perform some tests in portrait mode.
We then set the device orientation to landscape using the .landscapeLeft enumeration value and perform some tests in landscape mode. Finally, we set the device orientation back to portrait and perform some additional tests.
By testing your app in both portrait and landscape orientations, you can ensure that your app’s user interface is responsive and looks good in all orientations.
How do you debug XCUITest failures, and what tools do you use to do so?
Debugging XCUITest failures can be challenging, but there are several tools and techniques you can use to help diagnose the problem. Here are a few:
- XCTest logs: Xcode provides a detailed log of the test run, which can help identify the cause of any failures. To access the log, select the “Report Navigator” in Xcode, then select the test run that failed. The log will show the steps performed by XCUITest and any errors encountered.
- Breakpoints: You can use breakpoints to pause the test at a specific point and inspect the state of the app and the test. To set a breakpoint, simply click on the line number where you want to pause the test, and Xcode will highlight it in red. When the test reaches that point, it will pause and you can inspect the app and the test.
- Debugging tools: Xcode provides several debugging tools that can help diagnose XCUITest failures. For example, the “View Debugger” can be used to inspect the hierarchy of UI elements in the app, and the “Debug Memory Graph” can be used to inspect the app’s memory usage.
- Screenshot and video recording: XCUITest provides a built-in API to take screenshots and record videos during the test run. This can be useful to visually inspect the app and the test at the point of failure.
- Print statements: You can use print statements to output debugging information to the console during the test run. This can help you understand the state of the app and the test at different points in the test.
By using these tools and techniques, you can effectively debug XCUITest failures and identify the root cause of any issues.
I hope I was able to provide helpful and informative answers. If you have any more questions or if there’s anything else I can assist you with, please don’t hesitate to reach out. I’m always here to help and provide insights on XCUITest and other related topics.
Let me know — along with any questions, comments, or feedback that you might have on https://www.linkedin.com/in/nshthshah.